SonarQube is a platform to analyze code quality,security and reliability.It is a continuous inspection engine and offers reports on duplicated code,exception handling, coding standards, unit tests, code coverage, code complexity, potential bugs, comments , design and architecture etc.
SonarQube supports 20+ programming languages.Plugins for some languages (C#, Java and, JavaScript) are bundled with the platform. To analyze a different language, we can install the plugin .
Installing SonarQube
1.Go to https://www.sonarqube.org/downloads/ and download the latest version of Sonarqube by clicking on Download Latest.
2.Unzip the downloaded archive.
3.Go to sonarqube-/bin folder.You will see different folders based on platforms.
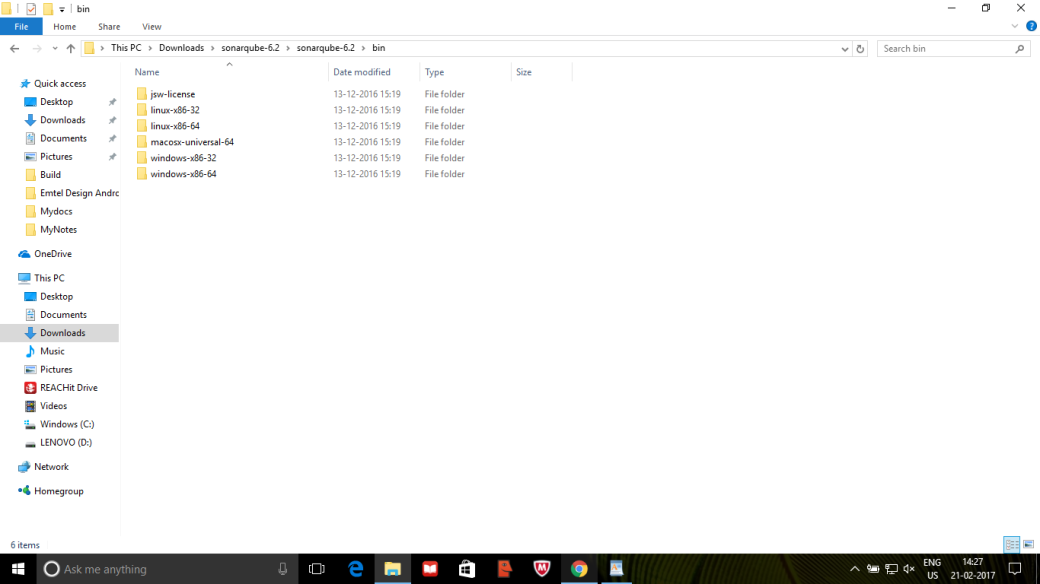
4.Open the corresponding folder according to your platform.There you should see a batch file named StartSonar for windows (or sonar.sh for other platforms)
5. Double click on StartSonar batch file(or open up a terminal window and execute: sonar.sh start for other platforms). This will open a sonarqube console.Wait for the execution to complete and then you will see message ‘Process[ce] is up’ and ‘SonarQube is up’.
6.Open localhost:9000 on browser.You will see Sonarqube web page.

Installing Sonarqube Scanner
7.Add sonarqube plugin to app module gradle file of your project.
plugins {
    id "org.sonarqube" version "2.5"
}
8.Define Sonarqube properties for your project and sync your project.
sonarqube {
    properties {
        property "sonar.projectName", "MyApplication2"
        property "sonar.projectKey", "SQKey"
        property "sonar.sources","src/main/java"
        property "sonar.language","java"
        property "sonar.sourceEncoding", "UTF-8"
//        property "sonar.exclusions", "src/main/java/com/foo/Foo.java"
    }
}
sonar.projectKey can contain any unique key name for your project.It should be different for every project you are analyzing with Sonarqube
sonar.sources contains the path of java files.
sonar.exclusions can be used to exclude directory/files from being analyzed by Sonarqube.
9.After building or syncing project,open Command Prompt and navigate to app module directory of your project where your gradle file is located.
10.Execute gradle sonarqube and wait until the build is completed.
If you get message “gradle is not recognized as an internal or external command” ,you have to set Gradle executable path in Environment variables(http://www.praveenboyalapalli.com/2015/02/gradle-is-not-recognized-as-an-internal-or-external-command-when-installed-android-studio/).
11.Refresh or open localhost:9000 web page on browser.You will see your project added.
Understanding Sonarqube analysis
At top right of web page you will see a login option.You can login as an administrator by using both username and password as admin .
12.On Home page you will see the count for the number of projects being added to sonarqube and number of bugs,Vulnerabilities and Code Smells.
As per their documentation,
Bugs
Bugs track code that is demonstrably wrong or highly likely to yield unexpected behavior.
Vulnerabilities
Vulnerabilities are raised on code that is potentially vulnerable to exploitation by hackers.
Code Smells
Code Smells will confuse maintainers or give them pause. They are measured primarily in terms of the time they will take to fix.
13.When you will navigate to Projects tab you will see projects being rated from A to E on the basis of Reliability,Security and Maintainability where A being best and E being worst. Also you will see percentage of duplications in the code and the size of code in terms of number of lines of code.
14.Quality Gate is the set of conditions the project must meet before it can be released into production.You can see whether your project is passed or failed in terms of Quality Gate.

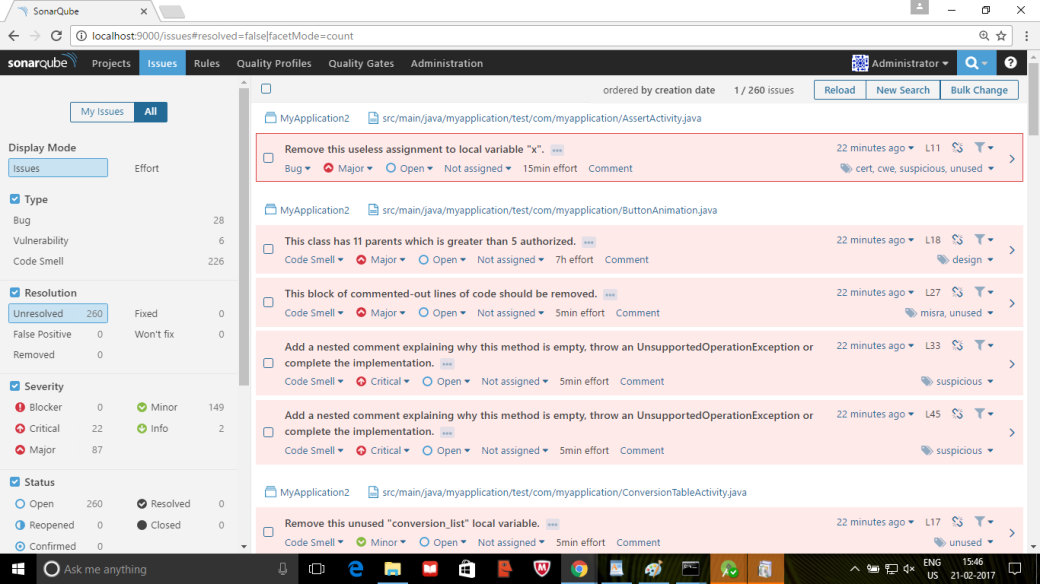
15.When you will navigate to Issues tab,you will see list of various issues your projects has. In the left panel you can apply various filters to list issues on the basis of type,severity,status etc.
When you will select Effort in Display Mode you will see estimated time required to handle these issues.
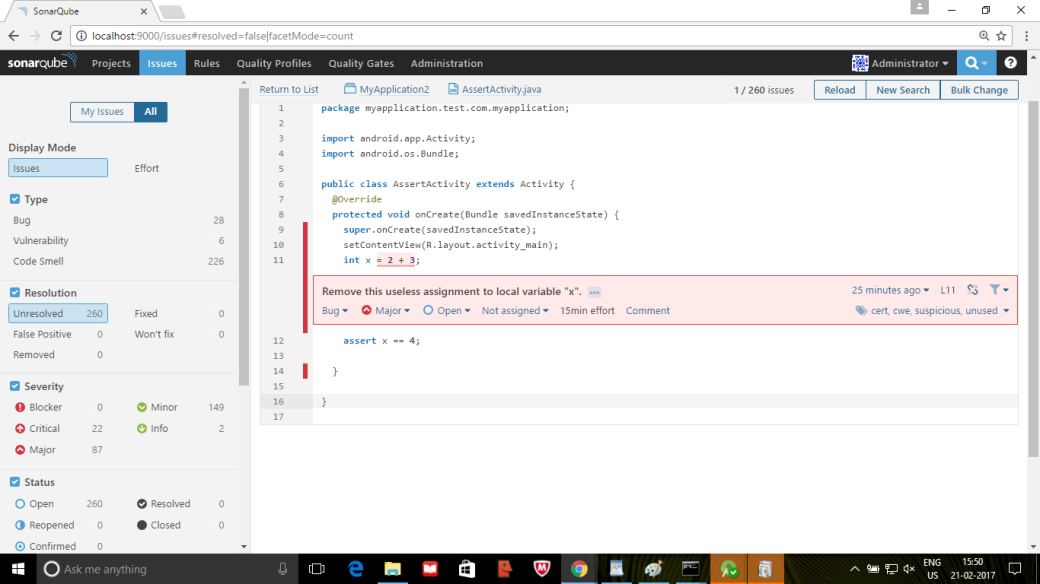
16.Clicking on the arrow at the right end of an issue will take you to the line in your code where issue is found.
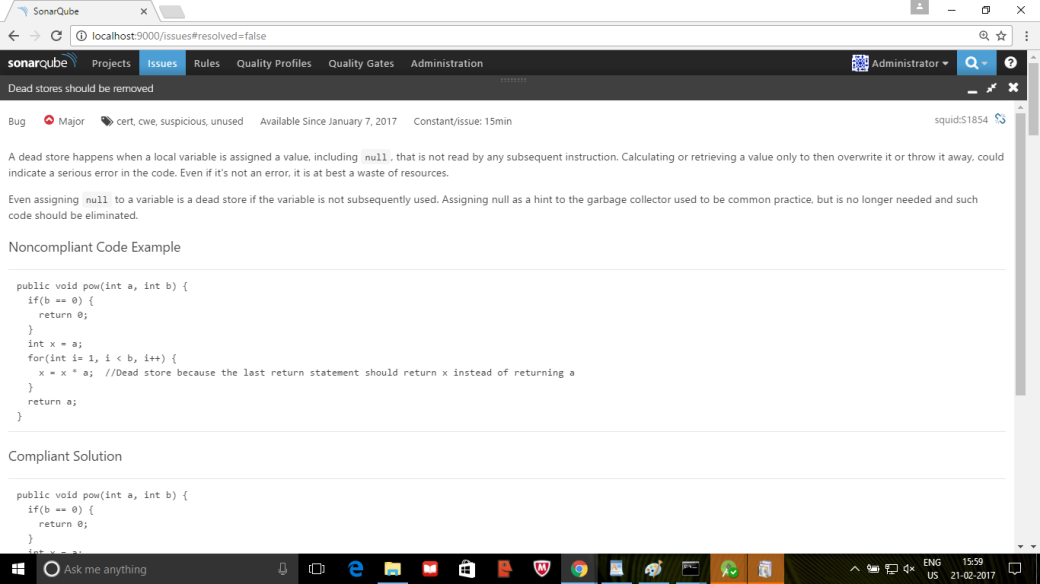
17.Clicking on three dots at the right of an issue will give you detailed report about the issue with Compliant and Non Compliant code example.
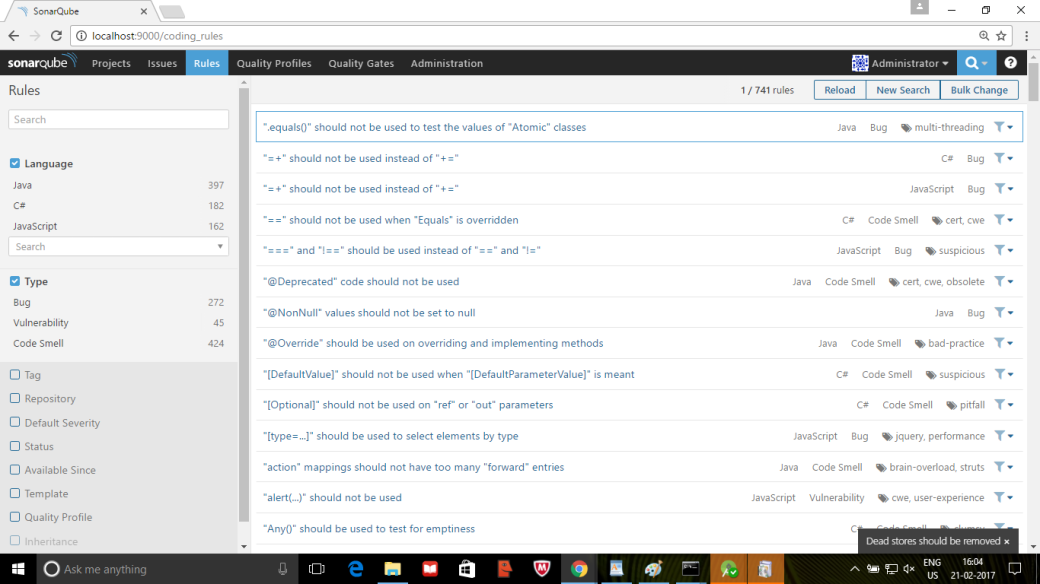
18.When you will navigate to Rules tab , you will see the list of rules on the basis of which inspection is done.In the left panel you can apply various filters to list rules on the basis language,type,tags etc.
19.Navigating to Quality Profiles,you will see different quality profiles corresponding to each language.Quality Profiles are collections of rules to apply during an analysis.For each language there is a default profile.Clicking on down arrow on a profile which is not default you will see Set as Default option.

Clicking on a quality profile will open quality profile page where you can see number of active and inactive rules.Clicking on the count for active and inactive rules will open the corresponding list of rules.

Clicking on the rule you will get the description of the rule and the option to activate it.Clicking on Activate will show a dialog where you can select quality profile and severity and activate the rule.

20. Navigating to Quality Gate tab will allow you to customize the conditions for Quality gate or create your own quality gate.

21. Administration tab section allows you to edit global settings for this SonarQube instance.
22.In Administration section,click on System tab and go to Update Center. Here you can install various plugins.
In Installed section you will see plugins which are already installed.
In Updates Only section you will see updates for various installed plugins.
In Available Section you will see various plugins which are available to install.You can install plugins for various languages which you want to support.Also there are plugins for various external analyzers like FindBugs which provide Findbugs rules for analysis of Java projects

Please feel free to post any queries,doubts or suggestions in comments section and I will get back to you as soon as possible!
If you like my post please rate it as it will mean a lot to me!

Thank you very much for your post!
Pretty clear and straight forward explanations.
Quick question: Do you have any suggestion on plugins that everyone should use in the Sonar?
Thank you once again,
Levi
LikeLiked by 1 person
Hi Levi,
Glad that you liked my post!
Findbugs and Checkstyle are good external analyzers that you can use as plugins.Also you can use SoftVis3D which provides 3D visualization for structure of project using the city model metaphor ( http://softvis3d.com ).
For complete list of plugins check below link-
https://docs.sonarqube.org/display/PLUG/Plugin+Library
Thanks,
Bhuvnesh
LikeLike
Hello! Thanks for the awesome tutorial! But I have problem writing the plugins to the gradle-files. Exactly where should that bit of code be inserted in the application? MY project has two gradle.build files?
LikeLike
Code should be inserted in app module gradle file of your project(PROJECT_ROOT\app\build.gradle )
LikeLike
Hi. Thanks for the great tutorial!
I had a question concerning sonar.projectName property. I am seeing a mismatch in the sonar.projectName value (in your example its SonarqubeDemo) and the name of the project itself on SunarQube (in your example its MyApplication2) . Does the gradle wrapper ignore this field and set it with the project name of the android app instead?
LikeLike
Sonarqube web page will display name of project as whatever value you have given to sonar.projectName field and there will be no mismatch.I have updated the value for sonar.projectName in my post to avoid confusion.
LikeLike
Absolutely awesome tutorial!!!
But is there any way by which one can export the issues report? Like to pdf or excel format?
LikeLike
Thanks..Please go through below links-
https://docs.sonarqube.org/display/PLUG/Issues+Report+Plugin
and
https://stackoverflow.com/questions/41610718/how-to-export-results-as-a-pdf-report
LikeLike